2020.10.07
Expo + React Navigation V5 + GraphQL + TypeScript でNative & Web(SSR)のユニバーサルアプリ開発
こんにちは。F.S.です。
今回はタイトル通り、ネイティブとWebのユニバーサルアプリ開発を試していきたいです。
ExpoはReact NativeにおけるNative部分をラップしてくれるツールで、Expoが組み込んでいる基本的なネイティブモジュールの利用だけで済むならネイティブの開発環境すら必要とせず、ブラウザのIDEを使ってJSのみで開発することができます。(今回は普通にローカルに環境を作ってVS Codeで開発します)

React Nativeではこれまでのネイティブアプリに加えてWebアプリの開発も行えるような試み(React Native for Web)が行われています。Twitter Lite(PWAアプリ)などがこれを使っていると言われています。
React(.js)は元々Webフロントのフレームワークでしたが、React NativeのコンポーネントをWebにも対応しようというのがReact Native for Webです。したがって、HTML要素ではなくNativeコンポーネント(View, Button, Textなど)を使ってWeb&ネイティブアプリのUIを同時にコーディングしていくことになります。
2020年10月現在、Expo for Webはまだベータ版の位置付けで、React NavigationにおけるSSR含むWeb対応もexperimentalとなっています。
今回は題材として、Star Wars API(https://github.com/graphql/swapi-graphql)をデータソースにStar Warsの映画情報を閲覧するサンプルアプリを作ってみます。特に新たな試みとなるWebの対応を中心にみていきます。
主要モジュールのバージョンは以下の通りです。
@apollo/client: 3.2.1
@react-navigation/native: 5.7.5
@react-navigation/stack: 5.9.2
expo: 39.0.0
graphql: 15.3.0
typescript: 3.8.3
本投稿のサンプルアプリはこちらのレポジトリにありますので、必要に応じて参考ください。
https://github.com/gmo-satof/swapp
では、順追って進めていきます。
試行錯誤ありの幾分長丁場ですが、ご容赦ください。
Expo (with-typescript)プロジェクトを作る
プロジェクトを作成し、アプリのテンプレートを起動してみます。
% npx create-react-native-app -t with-typescript swapp
% cd swapp
% yarn web
この時点では1枚っぺらの画面に「Open up App.tsx to start working on your app!」が表示されるだけです。
React Navigation V5を使って画面遷移のモックを作る
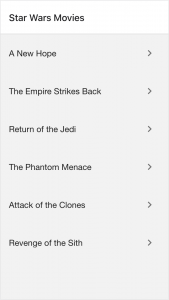
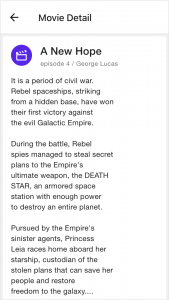
Star Wars APIから取得するデータで下記の画面モックを作ります。
- 映画のタイトル一覧(MovieList)
- 映画の詳細情報(MovieDetail)
このような画面(一覧と詳細)を作っていきます。
まずガイドに沿ってReact Navigationをインストールします。
https://reactnavigation.org/docs/getting-started
% yarn add @react-navigation/native
% expo install react-native-gesture-handler react-native-reanimated react-native-screens react-native-safe-area-context @react-native-community/masked-view
スタックナビゲーションを使うので、こちらもインストールします。
% yarn add @react-navigation/stack
ちょっとUIを整えるために React Native Paper を使います。
https://callstack.github.io/react-native-paper/getting-started.html
% yarn add react-native-paper
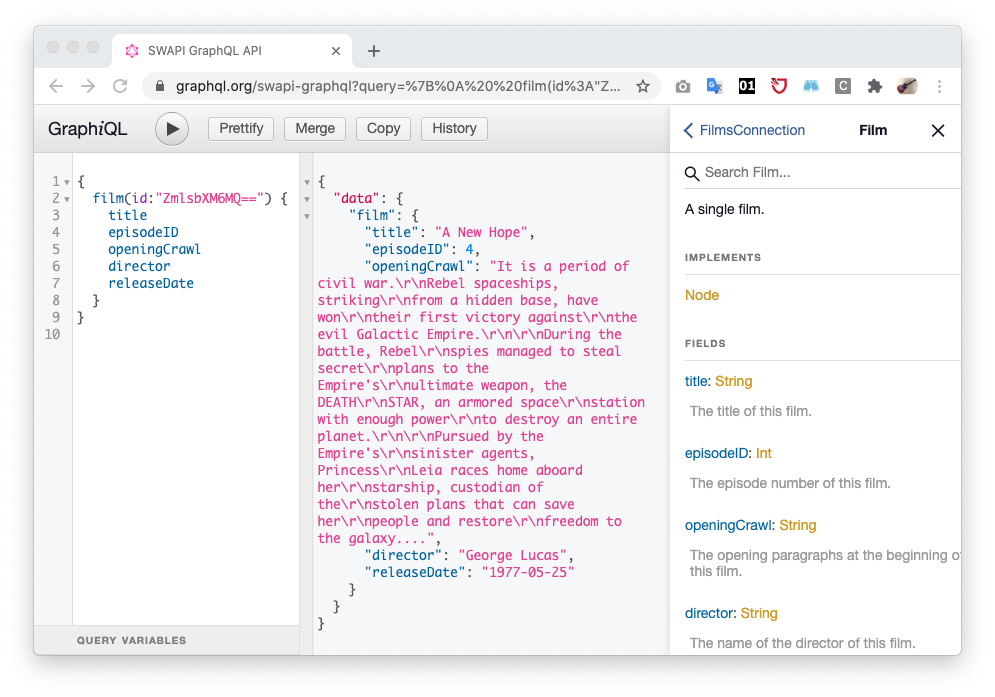
Star Wars APIのデモサイトから映画一覧と任意の映画詳細を取得するクエリの結果をコピーしてモックに当てはめます。
ソースコードはこのような感じになります。
App.tsx
import React from 'react';
import { Provider as PaperProvider,} from 'react-native-paper';
import { NavigationContainer } from '@react-navigation/native';
import { createStackNavigator } from '@react-navigation/stack';

import MovieList from './src/component/MovieList';
import MovieDetail from './src/component/MovieDetail';

const Stack = createStackNavigator();

export default function App() {
  return (
    <PaperProvider>
      <NavigationContainer>
        <Stack.Navigator>
          <Stack.Screen name="Home" component={MovieList} options={{ title: 'Star Wars Movies' }}/>
          <Stack.Screen name="Movie" component={MovieDetail} options={{ title: 'Movie Detail' }}/>
        </Stack.Navigator>
      </NavigationContainer>
    </PaperProvider>
  );
}
src/component/MovieList.tsx (新規作成)
import React from 'react';
import { ScrollView } from 'react-native';
import { List } from 'react-native-paper';

const data = {
  "allFilms": {
    "edges": [
      {
        "node": {
          "id": "ZmlsbXM6MQ==",
          "title": "A New Hope"
        }
      },
      {
        "node": {
          "id": "ZmlsbXM6Mg==",
          "title": "The Empire Strikes Back"
        }
      },
      {
        "node": {
          "id": "ZmlsbXM6Mw==",
          "title": "Return of the Jedi"
        }
      },
      {
        "node": {
          "id": "ZmlsbXM6NA==",
          "title": "The Phantom Menace"
        }
      },
      {
        "node": {
          "id": "ZmlsbXM6NQ==",
          "title": "Attack of the Clones"
        }
      },
      {
        "node": {
          "id": "ZmlsbXM6Ng==",
          "title": "Revenge of the Sith"
        }
      }
    ]
  }
};

export default function MovieList({ navigation }) {
  return (
    <ScrollView>
      {data.allFilms.edges.map(
          (edge) => (
              <List.Item
                  key={edge.node.id}
                  title={edge.node.title}
                  onPress={() => navigation.navigate('Movie')}
                  right={props => <List.Icon {...props} icon="chevron-right" />}
              />
          )
      )}
    </ScrollView>
  );
}
src/component/MovieDetail.tsx (新規作成)
import React from 'react';
import { ScrollView } from 'react-native';
import { Card, Paragraph, Avatar, Button } from 'react-native-paper';

const data = {
  "film": {
    "title": "A New Hope",
    "episodeID": 4,
    "openingCrawl": "It is a period of civil war.\r\nRebel spaceships, striking\r\nfrom a hidden base, have won\r\ntheir first victory against\r\nthe evil Galactic Empire.\r\n\r\nDuring the battle, Rebel\r\nspies managed to steal secret\r\nplans to the Empire's\r\nultimate weapon, the DEATH\r\nSTAR, an armored space\r\nstation with enough power\r\nto destroy an entire planet.\r\n\r\nPursued by the Empire's\r\nsinister agents, Princess\r\nLeia races home aboard her\r\nstarship, custodian of the\r\nstolen plans that can save her\r\npeople and restore\r\nfreedom to the galaxy....",
    "director": "George Lucas",
    "releaseDate": "1977-05-25"
  }
}

export default function MovieDetail({ navigation }) {
  return (
    <ScrollView>
      <Card style={{margin: 4}}>
        <Card.Title
          title={data.film.title}
          subtitle={`episode ${data.film.episodeID} / ${data.film.director}`}
          left={(props) => <Avatar.Icon {...props} icon="movie-open-outline" />} />
        <Card.Content>
          <Paragraph>{data.film.openingCrawl}</Paragraph>
        </Card.Content>
        <Card.Actions>
          <Button onPress={() => navigation.navigate('Home')}>Back</Button>
        </Card.Actions>
      </Card>
    </ScrollView>
  );
}
iOS, Android, Webアプリがこんな感じで動きます。それぞれでアラインメントやトランジションなど微妙に動きは異なりますね。
GraphQLを使えるようにする
まず Star Wars API のGraphQL Serverを立てます。ReadMeに沿ってlocal serverを起動します。
https://github.com/graphql/swapi-graphql
% git clone --depth 1 https://github.com/graphql/swapi-graphql.git
% cd swapi-graphql
% yarn
% PORT=8080 yarn start
yarn run v1.22.4
$ node lib/server
Listening at http://localhost:8080
次にApollo Clientを入れていきます。
https://www.apollographql.com/docs/react/get-started/
% yarn add @apollo/client graphql
ソースコードに追加していきます。
App.tsx
import React from 'react';
import { Provider as PaperProvider,} from 'react-native-paper';
import { NavigationContainer } from '@react-navigation/native';
import { createStackNavigator } from '@react-navigation/stack';
import { ApolloProvider, ApolloClient, InMemoryCache } from '@apollo/client';

import MovieList from './src/component/MovieList';
import MovieDetail from './src/component/MovieDetail';

const Stack = createStackNavigator();

const client = new ApolloClient({
  uri: 'http://localhost:8080',
  cache: new InMemoryCache()
});

export default function App() {
  return (
    <ApolloProvider client={client}>
      <PaperProvider>
        <NavigationContainer>
          <Stack.Navigator>
            <Stack.Screen name="Home" component={MovieList} options={{ title: 'Star Wars Movies' }}/>
            <Stack.Screen name="Movie" component={MovieDetail} options={{ title: 'Movie Detail' }}/>
          </Stack.Navigator>
        </NavigationContainer>
      </PaperProvider>
    </ApolloProvider>
  );
}
src/component/MovieList.tsx
import React from 'react';
import { ScrollView } from 'react-native';
import { List, Text } from 'react-native-paper';
import { gql, useQuery } from '@apollo/client';
const FETCH_ALL_MOVIES = gql`
query fetchAllMovies{
allFilms {
edges {
node {
id
title
}
}
}
}
`;
export default function MovieList({ navigation }) {
const { loading, error, data } = useQuery(FETCH_ALL_MOVIES);
if (loading) {
return <Text>Loading...</Text>;
}
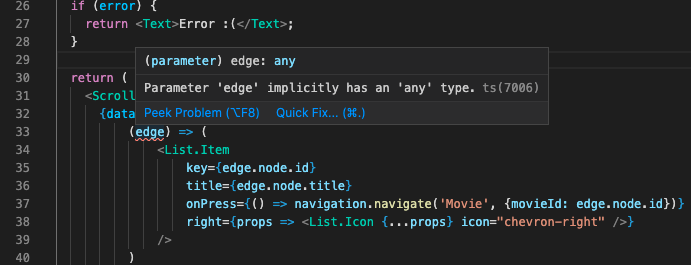
if (error) {
return <Text>Error :(</Text>;
}
return (
<ScrollView>
{data.allFilms.edges.map(
(edge) => (
<List.Item
key={edge.node.id}
title={edge.node.title}
onPress={() => navigation.navigate('Movie', {id: edge.node.id})}
right={props => <List.Icon {...props} icon="chevron-right" />}
/>
)
)}
</ScrollView>
);
}
src/component/MovieDetail.tsx
import React from 'react';
import { ScrollView } from 'react-native';
import { Card, Paragraph, Avatar, Button, Text } from 'react-native-paper';
import { gql, useQuery } from '@apollo/client';

const FETCH_MOVIE = gql`
query fetchMovie($id: ID!){
  film(id: $id) {
    title
    episodeID
    openingCrawl
    director
    releaseDate
  }
}
`;

const LeftContent = props => <Avatar.Icon {...props} icon="movie-open-outline" />

export default function MovieDetail({ navigation, route }) {

  const { id } = route.params;
  console.log(id);
  const { loading, error, data } = useQuery(FETCH_MOVIE, {variables: { id },});

  if (loading) {
    return <Text>Loading...</Text>;
  }

  if (error) {
    return <Text>Error :(</Text>;
  }

  return (
    <ScrollView>
      <Card style={{margin: 4}}>
        <Card.Title
          title={data.film.title}
          subtitle={`episode ${data.film.episodeID} / ${data.film.director}`}
          left={(props) => <Avatar.Icon {...props} icon="movie-open-outline" />} />
        <Card.Content>
          <Paragraph>{data.film.openingCrawl}</Paragraph>
        </Card.Content>
        <Card.Actions>
          <Button onPress={() => navigation.navigate('Home')}>Back</Button>
        </Card.Actions>
      </Card>
    </ScrollView>
  );
}
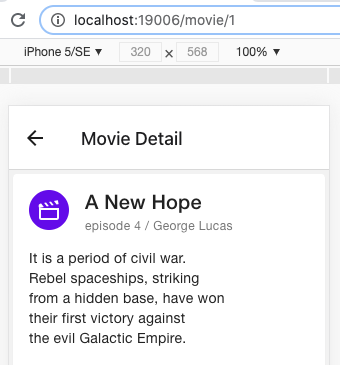
これにより実際にGraphQLで取得したデータを利用することができました。
見た目はほとんど変わりませんが、一瞬Loading画面が出たり、映画詳細の内容がタイトルごとに変わることが確認できます。
型をチェックする
with-typescript テンプレートで作成したプロジェクトでは厳密な型チェックオプションがついてません。オプションを追加することで、VS Code上でtypeエラーが強調されるようになります。
tsconfig.json
{
  "compilerOptions": {
    …
    “strict”: true
型が定義できていないところはエラーが出ます。
もちろん自身でtscコマンドを実行してチェックすることもできます。
% npx tsc
src/component/MovieDetail.tsx:20:39 - error TS7031: Binding element 'navigation' implicitly has an 'any' type.

20 export default function MovieDetail({ navigation, route }) {
                                         ~~~~~~~~~~

src/component/MovieDetail.tsx:20:51 - error TS7031: Binding element 'route' implicitly has an 'any' type.

20 export default function MovieDetail({ navigation, route }) {
                                                     ~~~~~

src/component/MovieList.tsx:22:37 - error TS7031: Binding element 'navigation' implicitly has an 'any' type.

22 export default function MovieList({ navigation }) {
                                       ~~~~~~~~~~

src/component/MovieList.tsx:41:73 - error TS2531: Object is possibly 'null'.

41                   onPress={() => navigation.navigate('Movie', {id: edge.node.id})}
                                                                           ~~~~~~~~~


Found 4 errors.

error Command failed with exit code 1.
info Visit https://yarnpkg.com/en/docs/cli/run for documentation about this command.
ここでは下記2点の型定義について紹介します。
- GraphQLのdata
- React Navigation関連のパラメータ
GraphQLのdata
GraphQLから取得できるデータの型はApolloのツールで機械的に定義が作成できます。
https://github.com/apollographql/apollo-tooling
% yarn add -D apollo
apollo.config.js (新規作成)
module.exports = {
    client: {
      name: 'client',
      includes: [‘./src/**/*.{ts,tsx,graphql}’],
      tagName: 'gql',
      addTypename: true,
      service: {
        // remote endpoint
        name: 'sever',
        url: 'http://localhost:8080',
      },
    },
  };
package.jsonに下記2つのコマンドを追加します。
- apollo client:download-schema
graphqlサーバからスキーマをダウンロードする - apollo client:codegen
ソースコード内のクエリで使用しているデータのinterface定義を自動生成する
(ダウンロードしたスキーマを使うようにする)
package.json
  "scripts": {
    …
    "apollo:download-schema": "apollo client:download-schema",
    "apollo:codegen": "apollo client:codegen --target=typescript --localSchemaFile=schema.json"
  },
コマンド実行します。
% yarn apollo:download-schema
% yarn apollo:codegen
デフォルトで __generated__ というディレクトリが作成され、その中にGraphQLクエリごとのinterface定義が自動生成されます。
ファイル名がクエリ名となるため、自動生成対象となる全てのクエリにユニークな名称がついてないと生成エラーになります。
生成されたinterfaceを用いて変数の型を指定します。
src/component/MovieList.tsx
import { fetchAllMovies_allFilms_edges } from './__generated__/fetchAllMovies';

// …

  return (
    <ScrollView>
      {data.allFilms.edges.map(
          (edge: fetchAllMovies_allFilms_edges) => (
            edge.node && (
              <List.Item
                  key={edge.node.id}
                  title={edge.node.title}
                  onPress={() => navigation.navigate('Movie', {id: edge.node.id})}
                  right={props => <List.Icon {...props} icon="chevron-right" />}
              />
            )
          )
      )}
    </ScrollView>
  );
}
React Navigation関連のパラメータ
React Navigation関連のtypeについてはこちらにドキュメントがあります。
https://reactnavigation.org/docs/typescript
Stackで受け渡ししているroute, navigationについてtypeを定義します。
src/component/MovieList.tsx
import { StackScreenProps } from '@react-navigation/stack';

type StackParamList = {
  Home: undefined;
  Movie: {id: String};
};

export default function MovieList({ navigation }: StackScreenProps<StackParamList>) {
  // …
src/component/MovieList.tsx
import { StackScreenProps } from '@react-navigation/stack';

type StackParamList = {
  Home: undefined;
  Movie: {id: String}
};

export default function MovieDetail({ route, navigation }: StackScreenProps<StackParamList, 'Movie'>) {
  // …
URLを整える
この時点では、Webアプリにて画面遷移してもアドレスが “http://localhost:19006” のままです。
そこで、画面に応じたURLが指定できるようにします。ネイティブの場合でも、ディープリング、ユニバーサルリンクに対応する際に必要になるものです。
やり方はいくつかあるようですが、今回はNavigationContainerにlinkingオプションを追加します。
https://reactnavigation.org/docs/navigation-container#linking
また、404 Not Found の画面も追加します。ドキュメントにやり方が記載されています。
https://reactnavigation.org/docs/configuring-links
ドキュメントではconfigにおけるNot Foundのパスを “*” としていますが、これではアドレスバーにてパスがスクリーン名の “NotFound” に上書かれてしまうので、元々のパスがそのまま残るようにわざとダミー変数(:path)にしています。
なお、GraphQLのIDがそのままURLに出てるとちょっとカッコ悪いので、base64モジュールを入れてデコードしたIDを使うことにします。
% yarn add react-native-base64
App.tsx
import base64 from 'react-native-base64';

// …

const linking = {
  prefixes: ['http://localhost:19006', 'swapp://'],
  config: {
    screens: {
      Home: "",
      Movie: {
        path: "movie/:id",
        parse: {
          id: (id: string) => base64.encode(`films:${id}`),
        },
        stringify: {
          id: (id: string) => base64.decode(id).replace(/^films:/, ''),
        },
      },
      NotFound: ":path"
    },
  },
};

export default function App() {
  return (
    <ApolloProvider client={client}>
      <PaperProvider>
        <NavigationContainer linking={linking}>
          <Stack.Navigator>
            <Stack.Screen name="Home" component={MovieList} options={{ title: 'Star Wars Movies' }}/>
            <Stack.Screen name="Movie" component={MovieDetail} options={{ title: 'Movie Detail' }}/>
            <Stack.Screen name="NotFound" component={NotFound} options={{ title: 'Star Wars Movies' }}/>
          </Stack.Navigator>
        </NavigationContainer>
      </PaperProvider>
    </ApolloProvider>
  );
}
src/component/NotFound.tsx (新規作成)
import React from 'react';
import { StyleSheet, View } from 'react-native';
import { Text } from 'react-native-paper';
import { Link } from '@react-navigation/native';

type StackParamList = {
  Home: undefined;
};

export default function NotFound() {
  return (
    <View style={styles.container}>
      <Text style={styles.title}>404 Not Found</Text>
      <Link to='/' style={styles.link}>
        Go to home
      </Link>
    </View>
  );
}

const styles = StyleSheet.create({
  title: {
    fontSize: 36,
  },
  container: {
    flex: 1,
    justifyContent: 'center',
    alignItems: 'center',
    padding: 8,
  },
  link: {
    margin: 24,
  },
});
これで “/movie/1” などのリソースパスが使えるようになりました。
サーバサイドレンダリングに対応する
React NavigationのドキュメントにSSRのガイドがあります。
https://reactnavigation.org/docs/server-rendering/
また、react-navigationのレポジトリにserver実装例があるので、おありがたく拝借します。
https://github.com/react-navigation/react-navigation/tree/main/example
なお、exampeのbabel.config.jsにある React Navigationのモジュールを自身のパッケージにaliasするところはバッサリ消してしまいます。
では依存モジュールを入れていきます。
% yarn add koa
% yarn add -D @types/koa @babel/core @babel/node babel-preset-expo nodemon mock-require-assets
package.jsonに開発用のサーバ起動コマンドがあるので、こちらもそのまま拝借します。
package.json
  "scripts": {
    …
    "server": "nodemon -e '.js,.ts,.tsx' --exec \"babel-node -i '/node_modules[/\\](?react-native)/' -x '.web.tsx,.web.ts,.web.js,.tsx,.ts,.js' --config-file ./server/babel.config.js server\""
サーバ起動してみると、Apollo clientで使うfetchモジュールがないとエラーになりました。
%yarn server
[nodemon] 2.0.4
[nodemon] to restart at any time, enter `rs`
[nodemon] watching path(s): *.*
[nodemon] watching extensions: js,ts,tsx
[nodemon] starting `babel-node -i '/node_modules[/\](?react-native)/' -x '.web.tsx,.web.ts,.web.js,.tsx,.ts,.js' --config-file ./server/babel.config.js server`

Invariant Violation:
"fetch" has not been found globally and no fetcher has been configured. To fix this, install a fetch package (like https://www.npmjs.com/package/cross-fetch), instantiate the fetcher, and pass it into your HttpLink constructor. For example:

import fetch from 'cross-fetch';
import { ApolloClient, HttpLink } from '@apollo/client';
const client = new ApolloClient({
  link: new HttpLink({ uri: '/graphql', fetch })
});

    at new InvariantError (invariant.esm.js:12:28)
    at checkFetcher (checkFetcher.js:4:80)
    at createHttpLink (createHttpLink.js:15:5)
    at new HttpLink (HttpLink.js:8:39)
    at new ApolloClient (ApolloClient.js:20:19)
    at Object.<anonymous> (/Users/usr0101802/Documents/develop/expo/swapp/App.tsx:12:16)
    at Module._compile (internal/modules/cjs/loader.js:1251:30)
    at Module._compile (/Users/usr0101802/Documents/develop/expo/swapp/node_modules/pirates/lib/index.js:99:24)
    at Module._extensions..js (internal/modules/cjs/loader.js:1272:10)
    at Object.newLoader [as .tsx] (/Users/usr0101802/Documents/develop/expo/swapp/node_modules/pirates/lib/index.js:104:7) {
  framesToPop: 1
}
cross-fetchモジュールを入れて、For exampleの通りに修正します。
% yarn add cross-fetch
App.tsx
import fetch from 'cross-fetch';

// ...

const client = new ApolloClient({
  link: new HttpLink({uri: 'http://localhost:8080', fetch }),
  cache: new InMemoryCache()
});
修正するとサーバが起動できたので、ブラウザで http://localhost:3275/ を開いてみます。
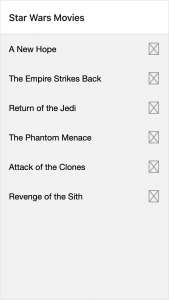
とりあえずHomeは出ました。アイコンは表示されません。
画像やフォントなどアセットを含めるには webpack-isomorphic-tools を使うと記載があるのでそれを使うのかもしれません(今回は試してません)。
※実は初回アクセス時はGraphQLクエリのloading中の画面が返却されてしまいます。2回目以降はおそらくキャッシュが使われて期待する画面が表示されます。回避方法は今回は調べられてません。
画面遷移のコードを変更する
さらに残念なことにSSRではList.ItemやButtonの onPress による画面遷移が動きませんでした。onClinkイベントに変換してあげる必要があるようです。
解決策として、React NavigationのLinkを使うことができます。
https://reactnavigation.org/docs/link
ただしLinkはTextコンポーネントを作るため、一部のスタイルが効かずデザインが崩れてしまいます。なので、Text前提でないLinkコンポーネントを作成してしまいましょう。
こちらを参考にuseLinkPropsを使うことで独自にLinkコンポーネントが作成できます。
https://reactnavigation.org/docs/use-link-props/
一から独自に作るのでも良いですが、Linkコンポーネントのソースを拝借してViewに対応するのが早いですね。
src/component/LinkView.tsx (新規作成)
import * as React from 'react';
import { GestureResponderEvent, Platform, TouchableOpacity, TouchableOpacityProps } from 'react-native';
import type { NavigationAction } from '@react-navigation/core';
import { useLinkProps } from '@react-navigation/native';

type Props = {
  to: string;
  action?: NavigationAction;
  target?: string;
  onPress?: (
    e: React.MouseEvent<HTMLAnchorElement, MouseEvent> | GestureResponderEvent
  ) => void;
} & (TouchableOpacityProps & { children: React.ReactNode });

/**
 * Component to render link to another screen using a path.
 * Uses an anchor tag on the web.
 *
 * @param props.to Absolute path to screen (e.g. `/feeds/hot`).
 * @param props.action Optional action to use for in-page navigation. By default, the path is parsed to an action based on linking config.
 * @param props.children Child elements to render the content.
 */
export default function LinkView({ to, action, ...rest }: Props) {
  const props = useLinkProps({ to, action });

  const onPress = (
    e: React.MouseEvent<HTMLAnchorElement, MouseEvent> | GestureResponderEvent
  ) => {
    if ('onPress' in rest) {
      rest.onPress?.(e);
    }

    props.onPress(e);
  };

  return React.createElement(TouchableOpacity, {
    ...props,
    ...rest,
    ...Platform.select({
      web: { onClick: onPress } as any,
      default: { onPress },
    }),
  });
}
元々のLinkの実装において Textを生成しているところを Viewにすれば良いかな、というところですが、Viewだとネイティブアプリでタッチイベントを受け取らず画面遷移が動かなくなります。そのため、ViewではなくTouchableOpacityを作成しています。
LinkViewコンポーネントができたので、React Native PaperのList.Item部分をLinkViewを使ったコンポーネントに置き換えます。
src/component/MovieList.tsx
  return (
    <ScrollView>
      {data.allFilms.edges.map(
          (edge: fetchAllMovies_allFilms_edges) => (
            edge.node && (
              <LinkView
                key={edge.node.id}
                to={`/movie/${base64.decode(edge.node.id).replace(/^films:/, '')}`}
                style={[styles.row, styles.container]}
              >
                <View style={[styles.item, styles.content]}>
                  <Text style={styles.title}>{edge.node.title}</Text>
                </View>
                <View style={[styles.iconItem, styles.iconMarginRight, styles.marginVerticalNone]}>
                  <IconButton
                    icon="chevron-right"
                    color={Colors.grey500}
                    size={24}
                  />
                </View>
              </LinkView>
            )
          )
      )}
    </ScrollView>
  );
}

const styles = StyleSheet.create({
  container: {
    padding: 8,
  },
  row: {
    flexDirection: 'row',
  },
  title: {
    fontSize: 16,
  },
  description: {
    fontSize: 14,
  },
  marginVerticalNone: { marginVertical: 0 },
  iconMarginLeft: { marginLeft: 0, marginRight: 16 },
  iconMarginRight: { marginRight: 0 },
  item: {
    marginVertical: 6,
    paddingLeft: 8,
  },
  content: {
    flex: 1,
    justifyContent: 'center',
  },
  iconItem: {
    margin: 8,
    height: 40,
    width: 40,
    alignItems: 'center',
    justifyContent: 'center',
  },
});
これでSSRでも画面遷移ができるようになりました。
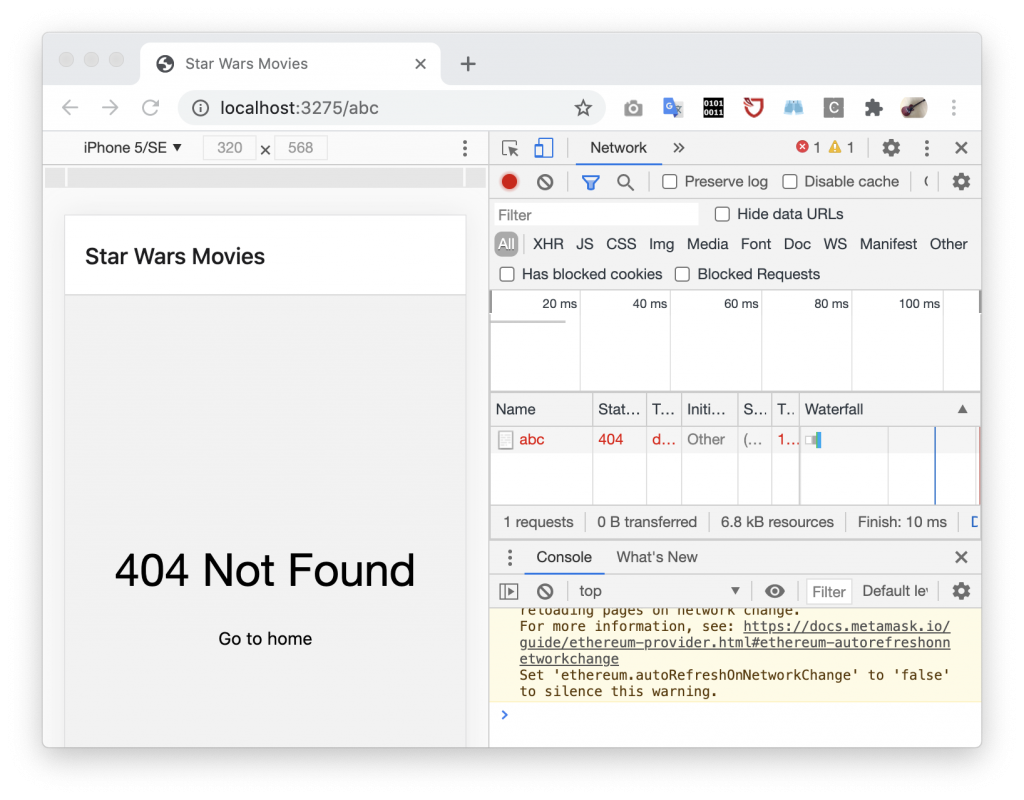
HTTPステータスコードを指定する
そして最後にもう一手間、404ページではHTTPステータス 404 を返却するようにします(今のままでは 200 が返ります)。
基本的にはこちらのガイドにしたがって対応すれば問題ありません。
https://reactnavigation.org/docs/server-rendering#handling-404-or-other-status-codes
対応すると、このようにHTTPステータス 404 が返却されるようになりました。
今回はここまで。それでは、また。
次世代システム研究室では、アプリケーション開発や設計を行うアーキテクトを募集しています。アプリケーション開発者の方、次世代システム研究室にご興味を持って頂ける方がいらっしゃいましたら、ぜひ 募集職種一覧 からご応募をお願いします。
グループ研究開発本部の最新情報をTwitterで配信中です。ぜひフォローください。
Follow @GMO_RD