2022.07.07
Save Development Time with tmux and tmuxinator
こんにちは、次世代システム研究室のN.M.です。
If you are not already familiar with tmux, it is a terminal multiplexer. Take a quick look here, then come back.
If you are developing a project where you have multiple terminal windows open, then this may help you.
tmux, is a great terminal management tool. You can create your session, with multiple windows, and panes inside your windows, run long-running commands, detach from your session, re-attach later and be able to view your terminals and commands as you left them.
But sometimes we want the ability to stop our session completely and then start the session with the same window configuration, and same commands executed. For example, when the server running tmux is restarted. Or you may want to stop your tmux session because it uses a lot of resources (such as when running docker-compose or local Kubernetes). When restarting you want your terminal environment to be the same as when you left your session, with the same windows, panes and same environment setup commands having run.
If you use raw tmux, when you stop your session you lose everything. This is why we need a tmux manager such as tmuxinator. Other tmux managers exist such as tmux-resurrect or tmuxp. I like tmuxinator because of it’s yaml configuration and ability to configure lifecycle hooks and commands.
tmuxinator, is a ruby gem that allows you to create and manage your tmux sessions, called projects in tmuxinator.
❯ tmuxinator --help
tmuxinator commands:
  tmuxinator commands                          # Lists commands available in tmuxinator
  tmuxinator completions [arg1 arg2]           # Used for shell completion
  tmuxinator copy [EXISTING] [NEW]             # Copy an existing project to a new project and open it in your editor
  tmuxinator debug [PROJECT] [ARGS]            # Output the shell commands that are generated by tmuxinator
  tmuxinator delete [PROJECT1] [PROJECT2] ...  # Deletes given project
  tmuxinator doctor                            # Look for problems in your configuration
  tmuxinator help [COMMAND]                    # Describe available commands or one specific command
  tmuxinator implode                           # Deletes all tmuxinator projects
  tmuxinator list                              # Lists all tmuxinator projects
  tmuxinator local                             # Start a tmux session using ./.tmuxinator.y[a]ml
  tmuxinator new [PROJECT] [SESSION]           # Create a new project file and open it in your editor
  tmuxinator start [PROJECT] [ARGS]            # Start a tmux session using a project's name (with an optional [ALIAS] for project reuse) or a path to a p...
  tmuxinator stop [PROJECT]                    # Stop a tmux session using a project's tmuxinator config
  tmuxinator version                           # Display installed tmuxinator version
Each of the commands provides functionality for creating a tmuxinator project.
Project configuration files are saved as yaml, you can edit these files using:
❯ tmuxinator open diesel-demo
This command will open up a project configuration yaml file for the diesel-demo project.
# /Users/USERNAME/.config/tmuxinator/diesel-demo.yml
name: diesel-demo
root: ~/projects/rust/diesel_demo

# Runs on project start, always
on_project_start: vagrant up

# Run on project stop
on_project_stop: vagrant halt

windows:
  - editor:
      layout: main-vertical
      panes:
        - code .
  - server:
     panes:
       - postgres:
         - vagrant ssh
         - sudo -u postgres psql
If this is the first time using tmuxinator open, you will see the default project configuration. The default has an example config for windows, panes, and lifecycle hooks.
I have already edited the configuration. On macOS, the file location is /Users/USERNAME/.config/tmuxinator/diesel-demo.yml.
The root config defines the default project directory. You can change this per window (using a window level root setting), or per pane (using the cd command).
There are two lifecycle hooks, that take care of starting and stopping my development vagrant box. The use of vagrant here is simply to demonstrate the use of lifecycle hooks, and to set up an example remote server.
The first window, editor, contains one pane, that starts vscode in the current directory.
The second window, server, contains one pane called postgres. Inside this pane, two commands are invoked, vagrant ssh and sudo -u postgres psql
Consequently, in the server window, we connect to our remote server, then run psql at the server.
If you run tmuxinator start diesel-demo, you will see the vagrant box startup, then when vagrant has started you will see a window similar to the following image.
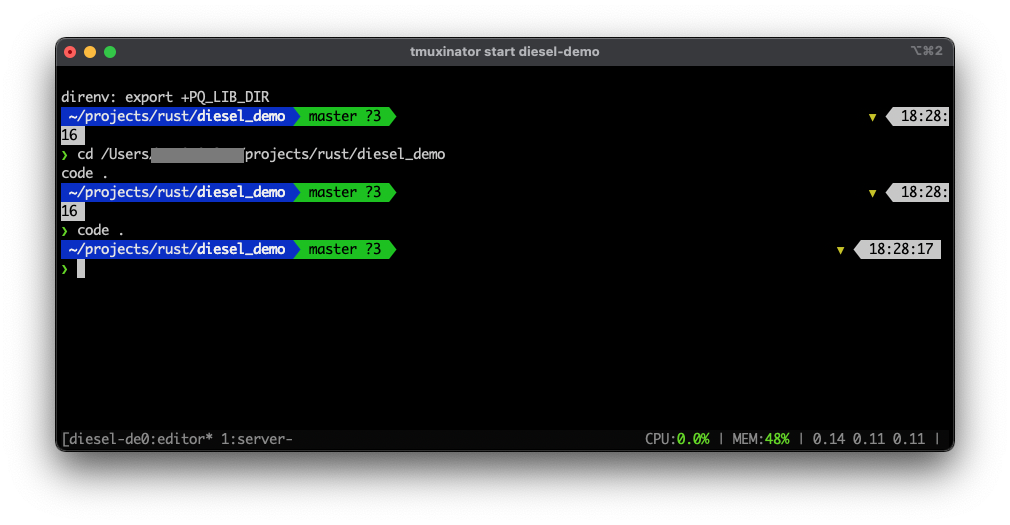
Here we see the editor tmux window. This contains a terminal prompt into my local environment within the /Users/USERNAME/projects/rust/diesel_demo folder. The command code . opened the vscode editor.
In the tmux status bar, we can see there are two windows, editor (* denotes the current window) and server. If we change to the server window, we can see the psql prompt running in our vagrant instance.
(Note, that my status bar has been customized, so it looks a little different, more on that later)
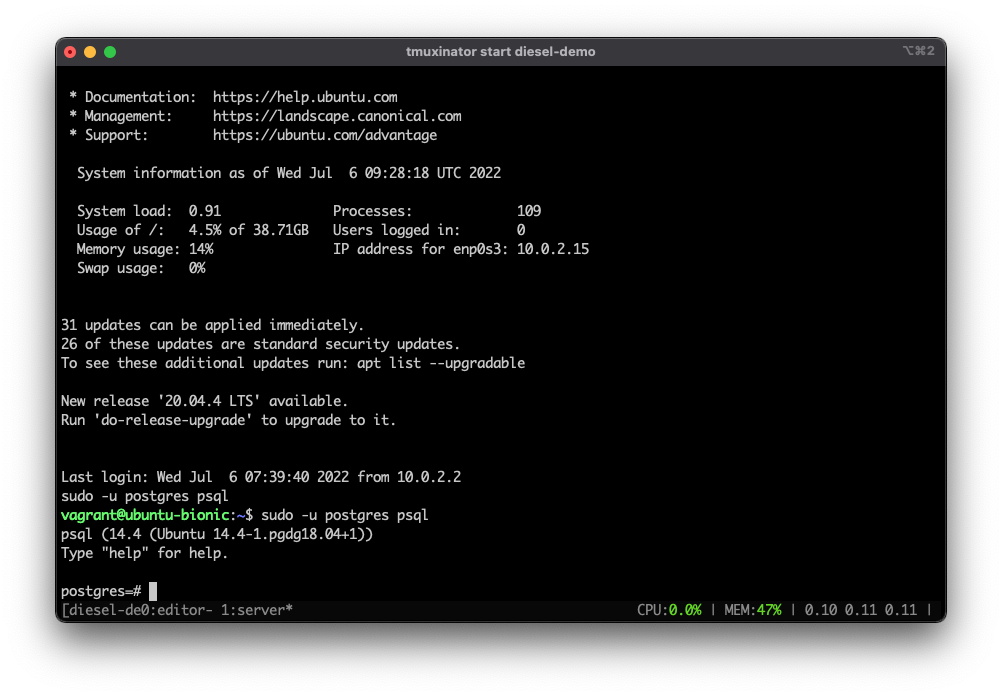
We can see the two commands defined for the server window, vagrant ssh and sudo -u postgres psql
So we have two windows, one local and one remote. We can create as many windows and panes as we want, each containing as many commands as we need. I hope you are beginning to see the power of tmuxinator.
Nested tmux Sessions
It is common to run tmux from a remote server.
For example, many of you may have a bastion server as your remote server, that you connect to first and then open a terminal on multiple app servers from the bastion. It also, is common to want to use tmux to manage each of these terminals.
In this case we would have nested tmux sessions. One session running locally and one from our remote server. As you know, tmux uses a prefix command (default C-b) to invoke tmux shortcuts, for example, the key combination to go to the next window is C-b n
When running nested tmux sessions, the prefix command is caught by the outer tmux session. By default, the prefix command for the inner tmux session is the prefix twice (default C-b C-b)
To make this easier, some tmux users have figured out how to toggle on/off the outer tmux session key bindings. When off, the prefix command is handled by the inner (remote) tmux session.
The code to do this shown in this gist from this medium post.
Just put it into your tmux.conf, usually located at ~/.tmux.conf, and run tmux source ~/.tmux.conf to reload the new configuration.
Once you have reloaded your tmux.conf, the status bar will still look a little strange. This is because the new tmux.conf uses a tmux plugin, which is not yet installed.
Now, you will be able to invoke a tmux session from within your tmuxinator project yaml and enter f12 to toggle off your outer tmux session and use C-b (or your configured prefix) commands for the remote tmux session.
Let’s change our tmuxinator project config with tmuxinator open diesel-demo.
# /Users/USERNAME/.config/tmuxinator/diesel-demo.yml

name: diesel-demo
root: ~/projects/rust/diesel_demo

# Runs on project start, always
on_project_start: vagrant up

# Run on project stop
on_project_stop: vagrant halt

windows:
  - editor:
      layout: main-vertical
      panes:
        - code .
  - server:
     panes:
       - remote:
         - vagrant ssh
         - tmux new-session -A -s main
Note that the server window creates a new remote tmux session or attaches to an existing session called main.
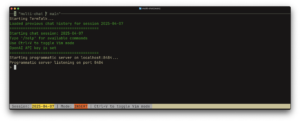
After hitting f12, the status bar for the outer (local) tmux session shows OFF in red, and I am able to use the C-b prefix remotely.
Now I can then change main as I wish.
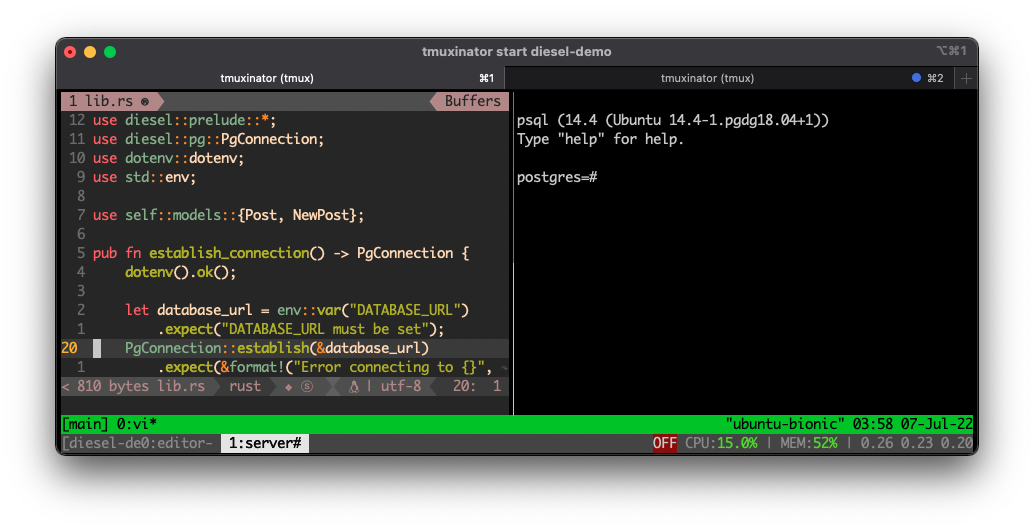
I have opened a source file with vim and added another pane to the remote tmux session using C-b %. In the second pane I invoked the psql command previously invoked from the tmuxinator project config.
Again toggling the outer tmux command prefix by hitting f12, I can now detach from my tmuxinator session, using C-b d, and re-attach, using tmuxinator start diesel-demo, and my remote session will still have the psql pane. This is because the remote session will last as long as the remote server is not restarted.
If I run tmuxinator stop diesel-demo, vagrant halt would be called by the tmuxinator lifecycle on_project_stop hook and I would lose my remote psql pane.
To have remote tmux sessions that survive remote server restarts, I could use a remote tmuxinator or use another tmux session management tool remotely.
tmux Plugins
tmux functionality is commonly extended using tmux plugins. There is a tmux plugin manager (tpm) for managing these.
This plugin manager takes care of downloading your plugins, and applying them to your tmux.
All you need to do is add two lines to tmux.conf:
- the plugin to install (in our case we want the tmux status bar to work properly so we need this plugin):
set -g @plugin 'samoshkin/tmux-plugin-sysstat'
- activate tpm (should always the last line of tmux.conf):
run '~/.tmux/plugins/tpm/tpm'
You may then do C-b I from a tmux session and tpm will download the new plugin. Enter return, when prompted, and tpm will install the plugin.
There are many other tmux plugins available.
After having installed the tmux-plugin-sysstat plugin your status bar should look more like the ones shown in this article. You may have to define variables for colors as shown in samoshikin’s article, or go directly to his tmux.conf.
Summary
- Here is have introduced tmuxinator for tmux, and explained how to set it up with a realistic example
- Also a solution is presented on how to handle nested tmux sessions for opening remote tmux sessions inside local sessions
- tmux plugins and tpm are expained
Of course, all this requires more work initially, as well as a learning curve. But this can make development easier, less stressful, and fun, so is worth it in the long run.
Resources and links:
- tmux: https://github.com/tmux/tmux/wiki
- tmuxinator: https://github.com/tmuxinator/tmuxinator
- nested tmux: https://medium.com/free-code-camp/tmux-in-practice-local-and-nested-remote-tmux-sessions-4f7ba5db8795
次世代システム研究室では、グループ全体のインテグレーションを支援してくれるアーキテクトを募集しています。インフラ設計、構築経験者の方、次世代システム研究室にご興味を持って頂ける方がいらっしゃいましたら、ぜひ募集職種一覧からご応募をお願いします。
グループ研究開発本部の最新情報をTwitterで配信中です。ぜひフォローください。
Follow @GMO_RD